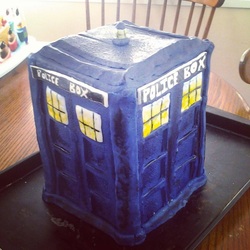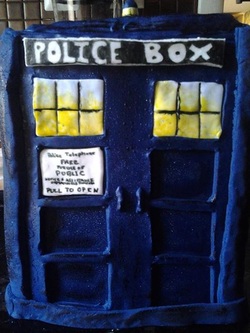
I spent a little time mulling these options over in my head and finally settled on making a Tardis cake. It's the first time I've ever attempted a "sculpted" cake and I think it turned out well for my first try, but why am I mentioning all this? Well, because in the process of making this cake I made the choice to try modeling chocolate over fondant and boy am I glad I did! It was a dream to work with compared to fondant and it really fortified the structure of the cake which fondant wouldn't have done, plus it tastes so yummy. Even if you don't have a cake to make, just mix up some modeling chocolate and get the kids or whoever is a kid at heart and start sculpting. It's basically edible clay. So here's a recipe for modeling chocolate. Go forth and play!

Dark Chocolate Modeling Paste:
7 ounces (200 grams)bittersweet chocolate, chopped
1/4 cup (60 ml) light corn syrup
Semi-Sweet Chocolate Modeling Paste:
7 ounces (200 grams)semi-sweet chocolate, chopped
3 1/2 - 4 tablespoons light corn syrup
White Chocolate Modeling Paste:
7 ounces (200 grams)white chocolate, chopped
1 1/2 - 2 tablespoons light corn syrup
Milk Chocolate Modeling Paste:
7 ounces (200 grams)Milk Chocolate
2 1/2 - 3 tablespoons light corn syrup
Melt the chocolate in a double boiler or in a glass bowl in the microwave at 30 second intervals til all is melted silky smooth. If you just want a chocolate colored modeling chocolate, use something other than white chocolate and then get right to pouring in the syrup. If you want colored modeling chocolate, you can use already colored chocolates or if you only have regular white, just add the food coloring after the chocolate is completely melted. Gel food coloring is best. Now add your corn syrup. You can heat this up for about 30 seconds to make it easier to pour and incorporate or just spray your measuring spoon with pam so the syrup slips right out. Stir diligently til all is incorporated. Don't freak out if you chocolate looks like it is suddenly burnt, that's how it is suppose to look. It will turn thick and gross. Lay it out on a sheet of wax paper or parchment paper and lay another piece on top, then spread the chocolate into a thin layer. Leave it over night to cool. If you're in a hurry you can place it in the fridge, but I prefer the slow cool process. The next day, break or roll up the chocolate and knead it til it is pliable. You're ready to have fun!

 RSS Feed